Sometimes you’re in a spot in life and you wonder, why did I put myself in this situation? Then, hopefully, you try to convince yourself that it is because the hard and scary moments in life are the ones that make it worth living. Well, I’m sure the people throughout history that said those cliché lines like, “what comes easy won’t last, what lasts won’t come easy” said them after the fact. I mean, who really believes that in the moment? It is just something used to get by, and that’s exactly what I’m trying to do, get by.
My life has been pretty good, and in a lot of ways I’d say pretty easy. The challenges I’ve had have all been ones I could face and overcome, to some extent or another. Sure, I’ve failed, had my heartbroken, and broken bones. Both physical and mental pain has come my way, but usually I try to avoid it; don’t most of us? It’s a scary, anxious feeling to be facing some sort of pain, but to avoid it doesn’t make sense in the long the run, according to those cliché sayings I was talking about above. Maybe, that’s why I did this, to face a fear? That would be nice, to think of this effort as a brave one. Or, it could’ve been the whim that it was; you know my spontaneous nature making yet another decision for me. Was I fed up for working for the man? We look for simple answers to questions that are posed simply, but in reality they are not that simple, and that is the case here. All I know is that I am in a town where I know no one, starting my own farm, with about as much experience farming as the amount of people I know here, 0.
I came home from Mexico because of the corona virus, my plans of staying in Latin America uprooted, and that’s okay. When I arrived back in Massachusetts I needed to adapt to the present situation, a pandemic. Well, I don’t have experience with that, and turns out nobody alive on this earth has experience with it, so I began pondering how I could adapt, what could I do? Hmmm, a go to with so much time is to get a job and work, check. See old friends, check. Spend quality time with family, check. Get back in shape, check. But I wanted more. You could even say I needed more because I’m a dreamer, that’s what I do, I daydream.
Ever since I was a little boy I can remember daydreaming long hours away in school, thinking of adventures and different scenarios and how I would handle them. Here I am, 26, and not much has changed, except for the fact that I now have the independence to act on them (oh how I long for childhood boundaries again). The new job I got when I was home was for a farm, which incorporates a side of ecology, being outdoors, service to others, and hard labor; four things I really can get behind for a day well spent. Naturally, I began dreaming about getting out of my parents house, and not working for somebody else, while farming. Now, I don’t know exactly when it turned from a daydream to a reality, but it did.
Here I am typing this, getting my thoughts out, trying to figure this all out for myself, from my room in Vermont, fifteen minutes down the road from the newly leased farm. There is so much opportunity that I have stumbled upon here. From the land itself to the connection I’ve made with the person who owns the land. Now I’m wondering, pondering, sometimes even fretting if my skills, capabilities and knowledge will match the amount of opportunity. Can I make it happen? The truth is yes. I can and I know it. I also, know it won’t be any easy feat. But hey, as another cliché saying says, “the fundamental level of success is doing the hard things first. If you go for the feared thing first, the rest of the day is easy”. Maybe that’s why I made this decision; I’m just trying to make the rest of my days easier.
Uncategorized
Mt. Hancock (4420′) and South Hancock (4319′) Loop
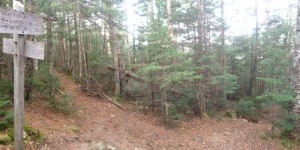
About a mile in on flat and easy terrain the sun began to hit the top of the trees of the forest I was in. As this was happening I heard the birds begin to chirp, it was if they were waking up and wishing all the living things around a good morning. After pausing and taking in the experience I kept hiking/jogging to the first junction of the hike (1.8 miles in). Here there are signs from the AMC that will guide you to the peaks of Mt. Hancock and South Hancock, follow the sign. Then hike another .7 miles on flat easy terrain to the second junction of the hike. Take the right,
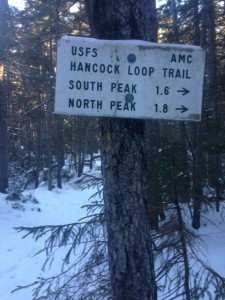
Sign for second junction (Thanks AMC!)
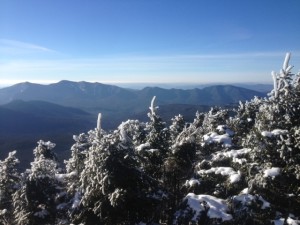
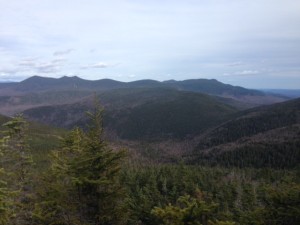
following the sign that says Hancock loop (pictured right). Then proceed another 1.1 miles to a trail split. Up until this trail split all the terrain on the hike is easy and mostly flat. During the time of year I went (early January) you will need microspikes for the ice on the trail and the river crossings. Once at the trail split to begin the Hancock Loop trail you will have the option to go right to South Hancock or left to Mt. Hancock; I chose to go up south Hancock first because the trail to the summit was a little shorter. This trail is quite steep, however once at the top (.5 miles) you can walk about 30 feet to a lookout and get some humbling views. The views will remind you how small you are and that humans don’t rule the whole earth. This southeast view looks out into complete wilderness as far as I could see and there was no sign of human impact in sight (roads, houses etc.). After taking in your view start your journey to the second peak walking the 1.4 mile ridge. This was such a peaceful and easy ridge hike and my favorite part of
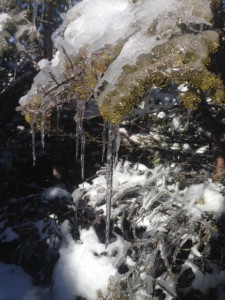
icicles formed that fell to make a pretty sound on their journey to the ground
the hike, partly because of the few, but pretty ridge views. Also the icicles that had formed on the pine needles kept falling off and making a wind chime type of sound, adding more amazement to the adventure. You arrive next at the 3 way intersection at the top of Mt. Hancock, follow the sign to the southwest outlook only about 100 yds away. The views are great, and again you have no sight of
human impact as far as I could see. Next follow the sign that says loop junction (.7 miles) down to the trail split from earlier. This trail is steep so take your time on it. Once you arrive follow the signs and take the trail out the same way you came in. back to the road, which you will cross, up to the parking lot where your car still is (hopefully). CHEERS!
FYI
- The trail starts about 600 feet down and across the road from where you park (Hancock overlook)
- If you are doing this hike in the winter bring microspikes and snowshoes. I didn’t need snowshoes, but bring for good measure especially if there is new snow on the ground.
- The trail is easy and flat for the first 3.6 miles then it becomes very steep.
- There are a couple of small river crossings, nothing deep or major, but be careful on them especially in the cold when there is ice.
- Bring enough food and water for the total 8.6 mile hike. took me about 3.5 hours with a good amount of jogging.
Getting There
Exit 32 off of I-93. Head east on the Kancamagus highway (Rt.12) like you are heading to Loon Mountain. It is about 20 minutes from exit 32 or about 10 minutes (7.5 miles) after you pass Loon Mountain. You will take a very sharp turn before the parking lot, on this sharp turn there is a sign that says parking 600 feet; by this sign is where the trail head begins. Park your car in the Hancock Overlook, walk to the end of the parking lot to where there is a trail, take this down to the road, cross and begin your hike!!
Mt. Moosilauke (4,802ft) and South Peak (4,523 ft)
An amazing hike, one of my favorites that will give you great views for not too much of a climb. I started this hike up

White trail markers to follow
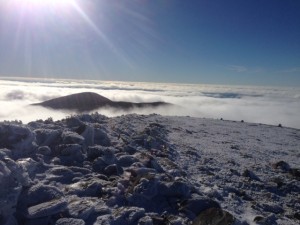
the glencliff trail. It starts off real pretty and easy taking you through a couple of fields where you can look up and see the mountains you’re about to climb hovering over you. In the first .4 miles the trail enters the forest and then splits, stay left on the glenncliff trail. following the white trail markers for 2.6 miles (which has really only one steep section the whole way) until you reach the South Peak junction. Here you will come to orange trail signs, make sure you follow the one that says “Southpeak .2 miles”. Once y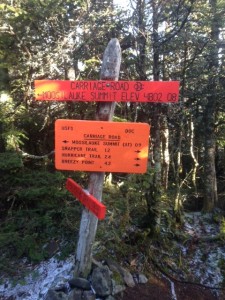 ou take this trail you will have spectacular 360 degree views at the peak and will be able to see the ridge that goes right up to Mt. Moosilauke. This first peak is an ideal spot for a break or just taking in the sights. Then go back down to the junction and follow the orange sign (pictured right) that says Moosilauke summit .9 miles. The ridge over to Moosilauke is so nice and flat and you may have the urge to run it! Once you start ascending again get your cameras ready because you will be entering the alpine zone (above tree line). After the total 3.9 mile hike (4.1 with south peak) out you have reached the top of Moosilauke and boy are the views something else! On the day I went we were above the clouds and spent as much time as we could up there. So much that we couldn’t do the loop we wanted to so we went back down the way we came. Once you’ve finished your roughly 8 miles (6.5 hours) of hiking for the day you will be back on the old logging road you started on and then back to the parking lot, where hopefully your car still is!
FYI
- This hike does not have a whole lot to it. The biggest thing is be prepared! Weather can turn quickly up in the mountains and especially in the alpine zone.
- If the weather turns and you are not prepared for it do not go into the alpine zone because the conditions will only get more extreme here.
- Make sure you have enough food and water for the 8 mile hike (always better to be over prepared)
- Follow the signs and you’ll be good!
Getting There
Getting to the trailhead in Glencliff, NH is pretty straight forward, however the first turn off of Rt. 25 onto High St. can be easily missed. Starting your way to the trailhead take exit 26 off of I-93 onto Rt. 25 West, stay on this route taking the first exit on the rotary you come to. After the rotary you stay on 25 West (merges with 118 for a bit) for 20

Parking lot sign for trailhead
miles until you see High st (Glencliff,NH) on your right. Stay on High St. for about 1.2 miles until you see the parking lot on your right. FYI if you cross the town line past Glencliff you have gone too far and missed the High st. tu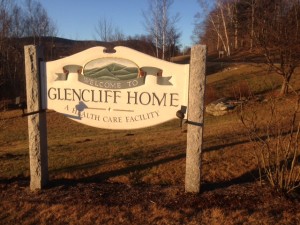 rn. Also the parking lot is right across from a healthcare facility sign (pictured right)
Tenney Mountain (2,349 ft)
Today I wanted to do a fairly easy, short hike near me, so I decided on Tenney mountain. This ski resort mountain has been closed for the past few years, but is in the stages of re-opening for the 2015-2016 season. This makes the hiking a bit easier since the trails are cleared just like on any other ski mountain. There are ski maps around the base
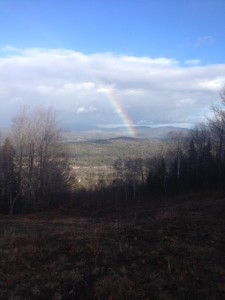
Condition of the trails with a nice views of the land and rainbow.
of the mountain that you can look at before starting your hike to pick the route you want. However, if you are looking for a more gradual and a bit longer of a hike there is a dirt road that winds up to the top. Either way the trails are cleared with good footing and nice views the whole way up; although it can get muddy and wet so be prepared. Once at the top you are greeted with a wide northeastern view. You will be able to see the windmills on the ridge to your north and a large amount of other mountains in the Plymouth area. The top is a great place to be this time of year since there is almost no one up there (I saw no one the whole time). Also you can either sit on the chair lift or the other chairs they have up there, which are great for unwinding, reflecting or maybe just have a snack.
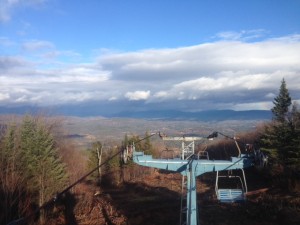
Views at the summit on top of the chair lift.
Once you’re ready to come down you can take any route you prefer; since all the trails lead to the resort you don’t need to worry much about getting lost.
FYI
- Look at the maps on the base before you get on the trails. You will be able to tell the steepness of the trail by its difficulty rating on the ski map.
- You can still come and do this hike mid-winter just know the trails will have skiers on them so wear your snowshoes or ski skins and stay on the side of the trail.
Getting There
From interstate 93 take exit 26 onto Rt. 25 headed West. Stay on this route until you come to a big rotary you will take your second exit on this rotary, which brings you onto route 3A. Drive on 3A for about 1.8 miles and the Tenney Mountain Resort you will be off of it on your right hand side. There is a big sign that you can’t miss. Pull in, drive up and you will have arrived at your destination. Hop out of your vehicle ready for a great local hike!
Jennings Peak (3460 ft) and Noon Peak (2976 ft)
I did these two peaks as a trail run with a bike spotted up the road at the beginning of the Sandwich Mtn trail and Drakes Brook trail. This was recommended to me by one of my professors and I have to say it was a great experience, mixing the trail run with a bike ride was a lot of fun. For the beginning of this route you park at the Smarts Brook trail parking lot. Here in the parking lot there are trail signs, which you should look at before taking off on your adventure because there are many smaller trails that break off of the Smarts Brook trail, used primarily for walking and cross country skiing in the winter. Starting on the Smarts Brook trail you will see this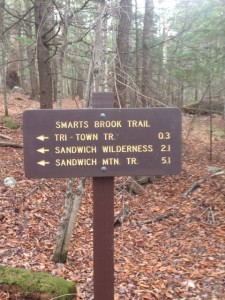 first sign by the parking lot. The beginning of this trail is an easy trail as it use to be a logging road. As you follow the trail you will also follow the Smarts Brook, which you will have to cross over a few times. The trail gets both muddy and wet at points so bring a waterproof pair of hiking boots or an extra pair of socks (unless you don’t mind wet feet). Also I would not recommend this trail after heavy rain. Once you have gone 2.1 miles you reach the Sandwich Wilderness where the trail starts to change, it turns into a narrow trail through a beautiful forest. On the trail the footing is good for the most part and it is mellow in elevation gain for most of the time with the exception of 3-4 steeper areas. At the end of this trail you come to an intersection, you want to go left here towards Jennings Peak. The peak for the trail in only about 4/10ths of a mile up the trail on your left. Once at the top the mountain rewards you with some spectacular views of the east and southwest.
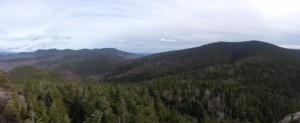
Sandwich Dome far right
Come down from the side trail of Jennings Peak and continue left on the trail and you come to a 3 way intersection,
here you want to follow the signs to RT.49. This will bring you to the parking lot where either your car or bike are. I followed the sign that said:” –> RT.49 2.5 mi.” This brings you to Noon peak and down the Sandwich Mtn. trail. It is a steep trail and not the best for running. However, you can take the Drakes Brook trail down, which I recommend, especially if you’re jogging. It is a little longer, but much more gradual. This trail totals 8.8 miles and brings you to the parking lot where I left my bike. I hopped on and started riding down RT.49, which has wide shoulders to ride on and not much traffic. It follows the Mad River down to the Smarts Brook parking lot. This bike ride is almost all slightly downhill and in almost exactly 5 miles (4.9 miles) you are back where you started.
Getting There
Start on I-93 and take exit 27 off onto Rt.3. Continue North on Rt.3 for about 2.3 mile s until you come to the junction for Rt.49 on your right. Continue on Rt.49 for 6.1 miles and you will see the sign for the Smarts Brook parking lot on your right.
FYI
When starting this trail make sure to look at the maps in the parking lot because there are a lot of other trails that intersect with the Smarts Brook trail in the beginning. Also when running or hiking on the Smarts brook trail be prepared to get your feet wet, parts of this trail are very wet and muddy. Once you are coming down from Jennings Peak and go left you come to the 3 way intersection.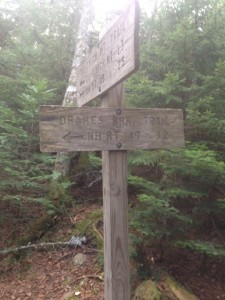
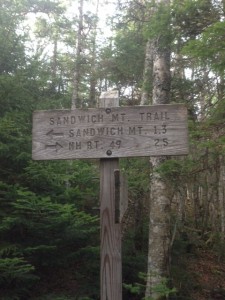
At this intersection you have two options, one is to go down the Sandwich Mtn. trail (picture on the right), which is the steeper of the two trails. Your other option that I recommend is going down the Drakes Brook trail (picture on the left) because it is not as steep. Lastly just lock your back at the other parking lot so it is there when you are. The hike/jog is about 9 miles (8.8 miles) and the bike ride is 5 miles. Get out, be active and enjoy the loop!!
Campton Bog
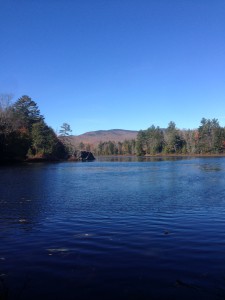
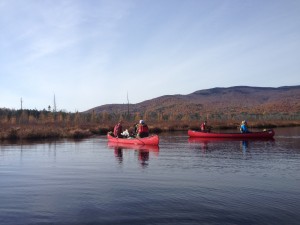
The Campton Bog is a great place to do some flat water paddling. This is a scenic area that has mountains as the back drop in almost all directions.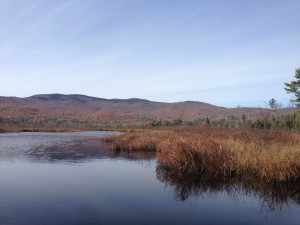 Whether looking to relax and enjoy the outdoors for the day or to go nature viewing this is a prime spot. The wildlife in this part of New Hampshire is amazing! Look for Waterfowl, deer, moose, birds, otters, beavers and more among the vast variety of marshland plants.
Coming in from either Bog Rd. or Beech Hill Rd. you’ll start at Bog pond where you can park your car and launch your watercraft. You can paddle around and check out the beautiful views on this pond, as you paddle about .3 miles to the other side of the pond it starts to narrow. Paddling up with this way is a lot of fun. If you wish to continue not to far up is a small beaver damn. You will have to portage over this so be sure to have on the proper footwear. On your way back if you want a little more excitement in your trip you can get some momentum and steer your canoe or kayak right over this damn, try not to flip! After the damn the bog continues for a good stretch until the main channel is blocked by another beaver damn. If you made it this far and head back you would have completed your 3-3.5 mile round trip tour of the Campton Bog!
Getting There
Arriving at the Campton Bog from I-93 is fairly simple. From 93 you take exit 27. Go West onto Blair Rd. If you were heading north on 93 you would take your first left and if you were heading south on 93 you would take your first right onto Blair Rd. Then take your first left (1/10th of a mile if that) onto Bog Rd. Follow this road for another 2.3 miles and it will bring you right to Bog Pond. Launch your watercraft or just walk around, but enjoy the day!
FYI
When driving on Bog Rd. to get the Bog pond make sure you do not take beaver brook Rd. After driving on Bog Rd. for about .7 miles it bears right and want to follow it. If you keep going straight it will bring you out of the way onto beaver brook Rd.
Also I have been on this Bog a few times now and I highly recommend it. The views are great and it’s secluded; of the 3 times I have been I haven’t seen anybody else on the water besides myself and the people I came with.
Mt. Chocorua (3,475ft)
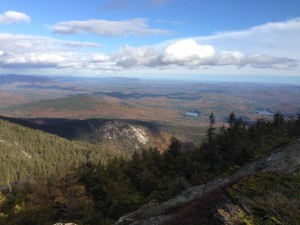
Mt. Chocorua via the Champney Falls trail is located in the town of Albany NH. This mountain is just east of the sandwich range wilderness and is the eastern most peak of the sandwich range. To summit Mt.Chocorua you hike for 3.9 miles. The trails are well kept, with moderate elevation gain, making it a moderate hike overall. This trail starts right off of RT.112. In the first 1.5 miles of the trail you are rewarded with the Champney Falls. This is an easy part of the trail to access. From the parking lot and back it only takes about 2.5 hours. After the falls you hike another 1.5 miles (following the signs to mt.Chocorua on the way up) until you are above tree line. This is when you start getting some picturesque views. Once you get on the peak of this rocky summit you will have 360° views. The eastern and southern exposure
gives you a great view of the lakes region. At the top you have two options. You can either do the summit loop which only adds about .2 miles onto your hike or you can go right back down the way you came. Totaling the hike to about 7.8 miles, which going at an average pace will take about 6 hours give or take.
Getting There
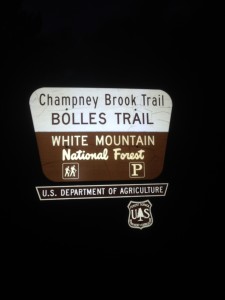
The easiest way to get to this trailhead is to take I-93 until exit 32. Get off this exit onto Rt.112, (Kancamagus Hwy) take this road east for about 26 miles (40 minutes) and you will see the parking lot on your right. The big sign that says “Chapmney Brook Trail, Bolles Trail” is where you will park and find the trailhead.
FYI
In the first tenth of a mile of this hike the trail will split. Make sure you stay to the left (Champney Falls Trail). The other trail is called Bolles trail and will take you into the sandwich range wilderness. Other than that the trail is pretty easy to follow, if you follow the signs for Mt. Chocorua at the different intersections on the trail. Be sure to check out the falls on the way up too. During high water they are spectacular, however, they are quite scanty when it is dry.
Mt.Flume (4,328ft) and Mt.Liberty (4,459ft) Loop
Peak bagging is known as summiting two or more peaks in one hike. In New Hampshire bagging peaks refers to getting to the top of 1 of the 48 4,000 footers in the white mountains region. This hike does exactly that, you summit 2 of the 48 4,000 footers (about 4% of the way to doing all of them haha) in this one 10.2 mile hike (give or take 2/10 of a mile). That being said this is one of the harder hikes in the white mountains(class 3). It is a very difficult hike that involves some scrambling (climbing with both feet and hands). The beginning of the hike starts from the flume visitor center. You start on the bike path at the flume visitor center, the same one that leads to the trailhead for Mt.Pemigewasset. Walk up this paved path for about 0.9 miles.

My friend Jesse by the trail sign. You’ll probably hear about him making and influencing policies in the conservation world in a couple of years.
You will then cross this bridge which, a couple of hundred feet (if that) over it is the trailhead on your right. This is where you will come across the sign for Liberty Spring Trail (part of the appalachian trail). Take the Flume Slide Trail for 0.6 miles until you come to a break to go left or right. The trail on the left, Liberty Spring Trail brings you to the summit of Mt. Liberty. While the trail on the right, Flume Slide Trail brings you to the summit of Mt.Flume. If you’re doing the loop I would recommend going up Mt.Flume and down Mt.Liberty because of the sheer steepness of the Flume Slide Trail (towards the top). Once you’re at the top you will come to a trail sign for the Franconia Ridge Trail. It will direct you towards the left to go to the summit of Mt. Flume and towards the top of Mt.Liberty(1.2 miles). The top of Mt.flume has some breathtaking views I would imagine (to socked in when I went). The openess at the top has you looking at over some pretty gnarly cliffs.
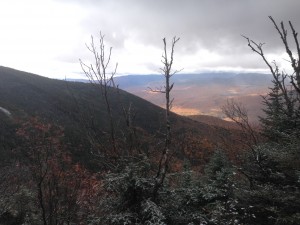
Quick view before the clouds came back.
Follow the trail for 1.2 miles until you summit Mt. Liberty another one with spectacular views (views came and went depending on clouds). Then down the Liberty Springs Trail where you come to the Liberty Springs tentsite about 0.3 miles down the trail. Also across from this is an area to fill up your water. After going down to the trail for 2.3 miles you’ll come to the trail you started on. After another 0.6 miles you will be back on the bike path. Go down this path for 0.9 and you’re back to where you parked. At this point you are probably thinking or talking about how enjoyable the hike was and that you are glad you didn’t go down the Flume Slide Trail only up it.
Getting There
Getting to the trailhead is fairly easy. Heading north you take exit 34A off of I-93 onto RT.3. From here you go north about 0.3 miles to the Flume Visitor Center on your right. Try to park as far left as possible (when facing the visitor center) in the parking lot. This is where the bike path starts, which you will have to walk for about 0.9 miles to get to the trailhead. If you have any questions or concerns about finding the trail or the hike itself just go into the visitor center and speak with a ranger, they will be more than happy to answer your questions.
–This is the address, contact info, and hours of operation to the Flume Visitor Center
-852 Daniel Webster Hwy, Lincoln, NH 03251
-603) 745-8391
-7 days a week 9am-5pm
FYI
-The Flume Slide Trail is truly steep at the top. It can get wet which makes it very slippery. If you can avoid going down this trail, do it, it will make your hike more enjoyable. So if you’re doing the loop, summit Mt.Flume first and Mt.Liberty second for a more appealing descent.
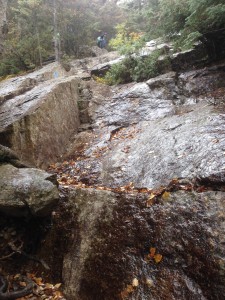
example of the steepness and wetness where you will need to scramble
-Also There is a water source right across from the tent site on Liberty Springs Trail. If you are lacking water this is a great spot to refill for anyone (no water filtration needed).
-Don’t worry! If you think the two peaks is too much or you don’t have enough time you can always do just one of them. Pick between Mt.liberty or Mt.Flume and save the other one for another day! Just make sure you gather info. on which either one you decide to do.
-A great thing about this loop is that it can be broken up into a two day-one night hike. It’s long enough to make this a fairly easy overnight hike and the campsite on the trail makes it even more perfect for that! Only 0.5 miles from summit of Mt.Liberty
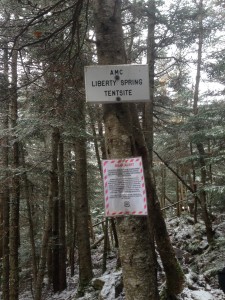
liberty spring campsite
